Strawberry Oatmeal, almost as easy as instant!


Remember the days when making oatmeal was a matter of adding water to a package of flavored Instant Quaker Oatmeal  sticking it in the microwave for about a minute and voilà breakfast was made?

Thinking about my childhood, I remember all the flavor choices from the box and mixing two different packages together to make unique combinations – they were all so delicious! The only problem is they really aren’t all that nutritious.

When I changed the way I viewed food and started to pay more attention to the nutritional impact they had on my body, stuff like Instant Oatmeal were among the first to go.

But oatmeal, even instant, is good for you right?
Well the answer is both yes and no. While oatmeal is one of the healthiest grains you can eat, flavored instant oatmeal contains more bad than good.

Why? Unless it’s plain, it’s loaded with junk. Junk like sugar, sodium, and artificial flavors/coloring. Even if it does taste good, how does it benefit your body? Or better yet, how does it damage your body?

Without going into all the nitty-gritty of why flavored Instant Oatmeal isn’t good for you, let me talk about an oatmeal that IS good for you!

Steel-cut oatmeal is an amazing grain!  It’s hearty (both in lowering cholesterol and keeping you full) and beneficial (especially to your blood sugar and your immune system).

steelcut oatmeal

Unfortunately, it does take 30 minutes to make and for most people that’s not really in the “quick & easy” category like instant oatmeal. However, there is a way to make it quick & easy!!

When making steelcut oatmeal in our house, we usually make a big batch on the weekend for the week. That way we have a great breakfast that we can heat up (or eat cold) in the morning. (It’s great travel food too.)  This makes it not only easy but it’s also quicker than instant when it’s pre-made!! Wahoo!  This is especially helpful with a newborn in the house. 🙂

It’s also healthier, heartier, and believe it or not tastier than instant!

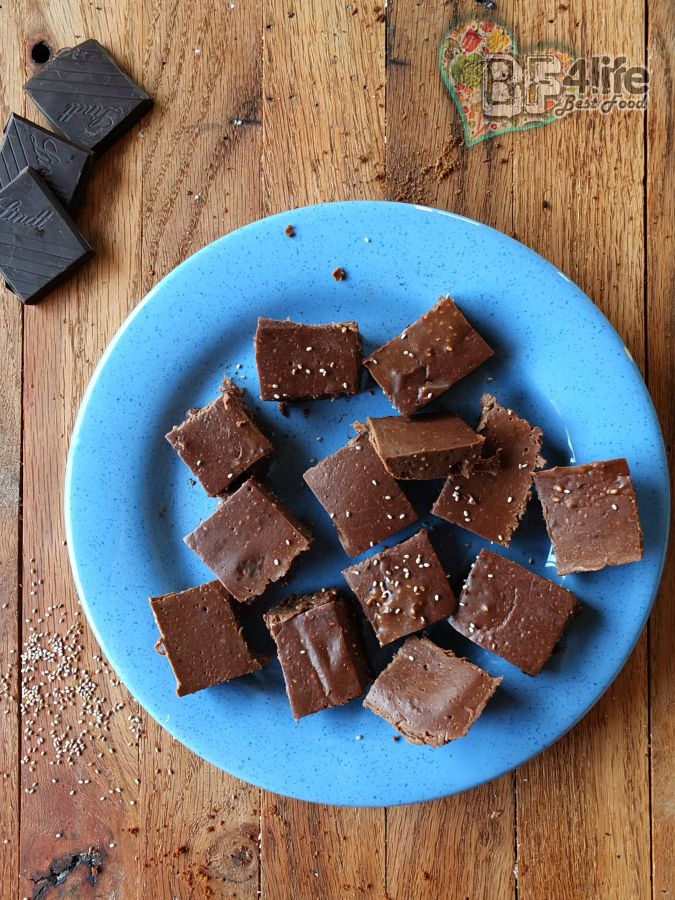
I thought I’d share a recipe that I made today that totally reminded me of that strawberry flavor from Quaker’s Instant Oatmeal–that I used to eat just straight out of the packet. 😉

Steelcut main with logo

Steel-cut oatmeal is a little tricky at first to make but once you get it down you can pretty much walk away and do other things for a half hour. (warning: before walking away for a half hour, make sure you stand near-by first round or else you might end up with an oatmeal explosion all over your stove!) There are several ways to make this, I’ll share the way I’ve found to be the least explosive! 🙂

Ingredients:

2 cups dry steel-cut oats (I use Bob’s Redmill Gluten Free version)
4 cups water
1/2 cup frozen strawberries
3-5 drops of liquid stevia

Directions:

Combine water and oats into a stainless steel pot, cover and turn heat to high.  Cook for 2 minutes on high heat, turn heat to low and cook for 30 minutes.
After 30 minute, turn off heat and remove lid.  Stir and add 3-5 drops of liquid stevia, then mix in the strawberries. Cover with lid and allow residual heat to soften strawberries for approx. 2 minutes.

steelcut up-close

Serve and enjoy and/or transfer to glass sealed container, refrigerate and enjoy throughout the week!

Instant Strawberry Oatmeal

Steelcut main with logo

Ingredients
  • 2 cups steel-cut oats
  • 4 cups water
  • 1/2 cup frozen strawberries (or fresh strawberries)
  • 3-5 drops liquid stevia (or sweetener of choice)
Directions
  1. Fill a medium sized pot with 4 cups of warm water
  2. Add 2 cups of steel-cut oats
  3. Stir, cover, and heat on high for 2 minutes
  4. Reduce heat to lowest setting and allow to cook for 30 minutes
  5. Remove from heat, stir and mix in liquid stevia (add to taste of desired sweetness)
  6. Mix in frozen strawberries and cover for 2 minutes allowing strawberries to thaw and soften from residual heat.
  7. Serve hot or allow to cool before storing in fridge.
  8. Will keep for approximately 5 days, though it rarely lasts that long!!

P.S. Even though my day is crammed to the max with taking care of the little one, I’ve really wanted to post a  recipe that’s not too complicated.  I thought, “why not blog about one I make all the time?” As simple as it may seem this easy oatmeal recipe is one that has kept me alive the past 2 months with a baby!  Not only is it healthy, it’s also excellent for boosting breast milk production AND it’s a quick grab out of the fridge when I’m like super-mega hungry-which is practically all the time!

p.p.s This “easy” blog post took a total of 9 hours from start to finish with baby interruptions. 😉

Chocolate Chia Pudding Gummies (Guest Post – RECIPE!!)


 *All New* Guest post from a fellow healthy eater/chef who makes the most amazing gluten-free options and gears her cooking towards the Paleo audience at her website: Cook It Up Paleo.  Heather comes up with amazing healthy options for the adored (unhealthy) foods like her newest recipe for Graham crackers – something I never thought I’d be able to eat again!  She makes it using cassava flour & coconut flour, instead of wheat, rice, or sorghum flour.  She uses really healthy ingredients too, so not only are these delicious but they are packed with nutrition.  She did it again with this latest recipe the Chocolate Chia Pudding Gummies–Which we get to snack on first!   You must check out her blog. 

Alright, let’s get to that recipe!  Thanks again Heather for taking the time to come up with this recipe for my readers.  Enjoy everyone! ❤

  JEM-Signature


chochiagummies2

Chocolate Chia Pudding Gummies

Hi everyone! My name is Heather Resler and I am so excited to be guest posting for Jem! I am the 18 year old blogger behind Cook It Up Paleo. I was diagnosed with celiac disease at age 16, and have regained my health through a healthy lifestyle and a paleo diet.

But now on to this recipe. It’s basically a conglomeration of all the things I love: chocolate, chia seeds, coconut, and pudding!

These gummies are easy to make and taste delicious. The gelatin is amazing for the hair, skin, and nails, and the chia seeds have nourishing fiber. And the chocolate is good for you too, of course!

chochiagummies1

Chocolate Chia Pudding Gummies
  • 1 cup full fat coconut milk
  • 2 tablespoons chia seeds (white or black; doesn’t matter)
  • ¼ cup unsweetened cocoa powder
  • 2 tablespoons maple syrup
  • Pinch salt
  • ¼ cup water
  • 3 tablespoons grass-fed beef gelatin
  1. In a small saucepan, combine the coconut milk, chia seeds, cocoa, maple syrup, and salt. Mix well and bring to a boil.
  2. Meanwhile, stir together the water and gelatin to dissolve.
  3. As soon as the coconut milk mixture boils, remove it from the heat and whisk in the dissolved gelatin.
  4. Pour the mixture into a glass standard-sized loaf pan and chill until set.
  5. Cut into squares and enjoy! Store in an airtight container in the fridge.

Chocolate Chia Pudding Gummies

Chocolate Chia Pudding Gummies

chocchiagummies3

  • 1 cup full fat coconut milk
  • 2 tablespoons chia seeds (white or black; doesn’t matter)
  • ¼ cup unsweetened cocoa powder
  • 2 tablespoons maple syrup
  • Pinch salt
  • ¼ cup water
  • 3 tablespoons grass-fed beef gelatin
  1. In a small saucepan, combine the coconut milk, chia seeds, cocoa, maple syrup, and salt. Mix well and bring to a boil.
  2. Meanwhile, stir together the water and gelatin to dissolve.
  3. As soon as the coconut milk mixture boils, remove it from the heat and whisk in the dissolved gelatin.
  4. Pour the mixture into a glass standard-sized loaf pan and chill until set.
  5. Cut into squares and enjoy! Store in an airtight container in the fridge.


About Heather at Cook It Up Paleo

heather circleMy name is Heather Resler and I am 18 years old. I’ve been eating paleo since I was 14. I love to cook, take pictures, and learn about the scientific side of nutrition. When I’m not doing those things, I’m usually writing a blog post, watching Psych on Netflix with my family, lifting heavy things, or grabbing a black coffee from the local coffee shop. Check out my blog, Cook It Up Paleo, and my ebook, Grain-Free Family Favorites, and don’t forget to follow me on Facebook, Instagram, Twitter, and Pinterest. 🙂


Earth Day Tribute: How to save your wilting leftover produce including recipe-Earth Day Sauté (Gluten Free, Vegetarian/Vegan-option, SCD, Candida, Paleo, optional Dairy-free, soy free, nut free)


Today is Earth Day as you all know and it’s always important to remember that the earth provides us the beautiful produce we utilize for our health.  We have a lot to be grateful for and there are plenty of ways to repay our debt including recycling, composting, and not being wasteful with our energy but what about using up old ‘wilting’ leftover produce?

In my house we rarely throw food away.  If I make a recipe for one dish, I’m always using up the leftovers in another dish.  A lot of people I talk to seem to run into the same problems with their leftover produce, “I just made this awesome recipe, now what do I do with the leftovers?” Most of the time for a lot of people that means throwing the fresh (now wilted) produce into the compost-BUT WAIT!  Before you toss out that limp rainbow chard or basil, think about ways you can use that produce in efforts to not ‘waste’ an otherwise still nutritious plant.

Earth day inspired me to also make it clean-the-fridge-day! The past couple of days I have been doing my best to use up all the produce in making whatever meals I could before today’s grocery shopping trip.  While cleaning the fridge, I found some rainbow chard buried beneath the two beautiful kale bunches in the vegetable drawer.  It was looking pretty pathetic, wimpy and well not really something I’d want to toss into a delicious crisp salad.  However, I know that this chard is still very nutritious for me and I really wanted to put it to good use.  I also found last week’s pint of heirloom tomatoes and some shredded cabbage in a container (if you buy cabbage and it starts to go soft after a week, shred it up and sauté it into a delicious cabbage salad which you can use as a snack or as ‘noodles’ for Phad Thai–more on that in another post, yes you can also use fresh cabbage).  The heirloom tomatoes were the ‘baby’ version and two had started to lose their moisture (aka shrivel), so I absolutely needed to find away to eat these guys before they all lost their moisture.  Luckily I have a dog who loves tomatoes and while the two shriveled tomatoes weren’t esthetically pleasing to me, he LOVES them no matter what they look like.  I also found some leftover (about 1/4 cup) of cooked ground turkey meat from a couple mornings ago.  Okay!  I think I got enough to make a pretty awesome meal!

Saute Cabbage and rainbow chard

After I finished adding all the goods to the fridge I decided to open up a new package of goat cheese and use about 1 tbsp. for this recipe.  This was an afterthought, the recipe was already really good without it but I was really craving some goat cheese. Note: you do not have to add goat cheese to this dish to make it tasty but if you got some-why not add it?

(recipe below)

Earth Day Sauté

Tomato, Rainbow Chard, Cabbage, ground turkey and goat cheese

Ingredients:

  • 1 tbsp. Coconut oil
  • salt to taste
  • Half a bunch of rainbow chard finely chopped (or any other greens you find on their last leg)
  • 1 cup of shredded cabbage (thinly sliced)
  • 6 cherry sized heirloom tomatoes halved (or any tomato chopped to 1″ pieces)
  • optional: you can add to this: 1-2 tbsp. chives/green onions, 1/4-1/2 cup sliced leeks, 1/4 cup chopped onions, 1/2 cup finely chopped spinach, 1/4 cup minced celery, 1-2 tbsp. sliced olives and/or any other herb mint, cilantro, parsley, dill, etc..
  • 1/4 cup of cooked ground turkey breast or leftover meat of your choice (preferably lightly seasoned or salted)  optional: if you don’t have leftover meat you can also go vegetarian/vegan on this and add a handful of nuts instead.

Directions:

  1. Heat cabbage on cast iron pan on medium-high for 1 minute.
  2. Stir cabbage and add a dash of salt (this will help dry out the cabbage) cook for another minute.
  3. Add coconut oil and rainbow chard (stir) cook for about 2 minutes. (if you have onions, this is when you’d add the onions)
  4. Add tomatoes, meat/nuts and any other options you want at this time and cook for 1-2  minutes before turning off heat.
  5. Salt and season to taste.
  6. Optional add 1-2 tbsp. chevre goat cheese and stir in to create a creamy base.

Enjoy!

Make a special creation today?  Please share your creation in the comments section below!

Thanks for reading, hope this inspired you to use up your leftover produce!!

JEM-Signature

Lettuce Wrap Turkey Burger w/pan-seared pork belly (Gluten-free, Paleo, SCD, anti-candida, nut-free, dairy-free (all animals), soy-free)


Turkey-Wrap-Logo

This is one to NOM home about!  Seriously delicious!!

I had a mega craving lately for bacon BUT because I’m also healing my husband’s GAPS and following a very specific Anti-Candida type regimen to help with resetting his body as a whole bacon is on the no-no list.  I’m not a big pork person because I believe pork doesn’t really have any nutritional benefit plain and simple.  However, I do like the idea of enjoying eating some pork a few times a year because quite frankly it’s freakin’ delicious!

With all that said we haven’t really eaten much of any pork for a long time-especially bacon.  In fact, it’s cured which really isn’t great for the gut or the colon.  Do some research on colon cancer and you’ll find a long list of ‘fermented foods’ as well as ‘cured-meats’ as a big detriment to colon health.  Another added negative bonus to the beloved bacon is that it’s also made with sugar and additives.  If you’re fighting overgrowth of candida in your body or are on the SCD diet, you need to avoid cured/sugar/additive foods like bacon.  However, all is not lost!

I have found a way to make a type of ‘bacon’ that not only compares to bacon it tops it in my book!  When pan-seared it’s absolutely delicious!  Of course I have a few tricks up my sleeve to give it that sweet delectable flavor that makes bacon so addicting.  Here’s some tips for making your pan-seared pork belly:

First, make sure you get pork belly from your natural foods market or butcher.  Ask them to cut the pork belly into strips (that resemble a slightly thicker bacon).

Second, when pan-searing get your cast iron pan to a nice medium-high temperature.  Pan sear the ‘bacon’ on one side, flip and then add: coconut aminos (this will give it that slightly sweet flavor that compares to the sugar added to bacon during the curing process) and a dash of mineral salt.  Cook for about 2 minutes each side.  The mineral salt will give the pork belly that salty flavor.

That’s it.  I like to add the salt after I add the coconut aminos and once I flip the ‘bacon’ again I’ll sprinkle a little bit more salt on the other side.  The only salt I really use is Himalayan salt, it’s got that perfect salty flavor so I don’t have to add too much salt. (plus its loaded with minerals).

Alright, now lets take a look at the recipe!


Ingredients for Turkey Patties: (makes 6 medium turkey patties)

  • 1 lb. lean ground turkey meat (pasture-raised white turkey meat)
  • 1 egg (optional)
  • 1/2 minced serrano pepper (adds a mild spice, for more heat up it to a whole serrano pepper)
  • 1/3 cup minced yellow onion
  • 1/4 tsp. mineral salt (Himalayan salt)
  • 2 minced garlic cloves  (Add more if you love garlic)
  • 2 tbsp. coconut oil

Instructions for Turkey Patties:

  1. In a large mixing bowl combine all the turkey patties ingredients and mix well with a fork.
    Step-1_-Ground-turkey-Burger-Mixture-LOGO
  2. Form medium size patties with the ground turkey meat and set aside. (makes about 6 patties)
  3. Heat 2 tbsp. coconut oil in a large cast iron pan on high until oil has melted.
  4. Turn heat down to medium-high and add turkey patties
  5. Cook for 2-3 minutes each side until golden brown on each side.
    Step-2-Ground-Turkey-Burgers-pan-seared-LOGO

Ingredients for Lettuce Wrap Sandwiches: (makes 6 servings)

  • Home-made turkey burger patties (see above)
  • 1 large head of romaine lettuce or two small heads of romaine lettuce
  • 1-2 tomatoes (beef, on-the-vine, or Roma sliced thin)
  • Mayo (see recipe)
  • Sautéed red onions in coconut oil (see instructions below)
  • 6 slices of pan-seared pork belly (see instructions below)

Instructions for Pan-Seared Pork Belly and Caramelized Onions:

  1. In a separate pan, pan-sear 6 (4″ strips) of thinly sliced pork belly
  2. Pan-sear each side for about 2-3 minutes each side until pork belly has a nice seared color caramelized color.  (add coconut aminos for sweetness and mineral salt for a salty flavor, combined make a savory bacon flavor)
  3. Remove strips and set aside
  4. Drain pork fat from pan (optional) and sauté sliced red onions in small amount of coconut oil (or use a tbsp. of residual pork fat)

Lettuce wrap turkey burgers w/pan-seared pork belly

Combining the pieces to the lettuce wrap is easy!  I’ll demonstrate the steps with beautiful pictures!

  1. Take one lettuce leaf and add one turkey burger.Step-3_Fully-Cooked-on-Lettuce-Wrap-LOGO
  2. Add sliced tomatoes (I used on-the-vine tomatoes)
    Step-4--Add-Tomatoes-2-LOGO
  3. Add slice of pan-seared pork belly aka homemade bacon!
    Step-5--Add-Bacon-LOGO
  4. s
    Step-6-Add-Saute-onions-LOGO
  5. Drizzle some delicious home-made eggcellent mayo or Dijon mustard.
    Step-7-Add-Mayo-LOGO
  6. Fold and enjoy!  NOM!

I am in love with this sandwich!  I don’t need cheese and I don’t care about the bread, the flavors make up for whatever anyone can find it to be lacking!!

Hope you enjoyed this recipe as much as we did!!

JEM-Signature

Lettuce Wrap Turkey Burger w/Pan-Seared Pork Belly

  • Servings: 6
  • Difficulty: Moderate
  • Print

Ingredients for Turkey Patties: (makes 6 medium turkey patties)

  • 1 lb. lean ground turkey meat (pasture-raised white turkey meat)
  • 1 egg (optional)
  • 1/2 minced serrano pepper (adds a mild spice, for more heat up it to a whole serrano pepper)
  • 1/3 cup minced yellow onion
  • 1/4 tsp. mineral salt (Himalayan salt)
  • 2 minced garlic cloves  (Add more if you love garlic)
  • 2 tbsp. coconut oil

Instructions for Turkey Patties

  1. In a large mixing bowl combine all the turkey patties ingredients and mix well with a fork.
  2. Form medium size patties with the ground turkey meat and set aside. (makes about 6 patties)
  3. Heat 2 tbsp. coconut oil in a large cast iron pan on high until oil has melted.
  4. Turn heat down to medium-high and add turkey patties
  5. Cook for 2-3 minutes each side until golden brown on each side.

Ingredients for Lettuce Wrap Sandwiches: (makes 6 servings)

  • Home-made turkey burger patties (see above)
  • 1 large head of romaine lettuce or two small heads of romaine lettuce
  • 1-2 tomatoes (beef, on-the-vine, or Roma sliced thin)
  • Mayo (see recipe)
  • Sautéed red onions in coconut oil (see instructions below)
  • 6 slices of pan-seared pork belly (see instructions below)

Instructions for Pan-Seared Pork Belly and Caramelized Onions:

  1. In a separate pan, pan-sear 6 (4″ strips) of thinly sliced pork belly
  2. Pan-sear each side for about 2-3 minutes each side until pork belly has a nice seared color caramelized color.  (add coconut aminos for sweetness and mineral salt for a salty flavor, combined make a savory bacon flavor)
  3. Remove strips and set aside
  4. Drain pork fat from pan (optional) and sauté sliced red onions in small amount of coconut oil (or use a tbsp. of residual pork fat)

Putting the pieces together for the Lettuce Wrap: (Instructions)

  1. Take a piece of romaine lettuce and add one turkey burger
  2. Add toppings (tomatoes, pan-seared pork belly, caramelized onions, and mayo)
  3. Fold and enjoy!

Quick & Easy Eggcellent Mayo (paleo, gluten-free, soy-free, scd, anti-candida, dairy-free (all animals), nut-free)


Eggcellent Mayo LOGO

A single and important stipulation about this recipe:

#1- This requires you to use ‘raw’ eggs which are healthy and good for you IF they are the right kind of egg.  What is that?  Simply put: organic pasture-raised eggs.

There are a lot of “titles” to egg names that do what they can to meet the minimum requirements to satisfy whatever the ‘new’ name of the game is for example: cage-free or free-range.  The media is simply great at creating hype about something where confusion sets in leaving us common folk confused as all hell as to what the heck egg is actually best and ‘safest’ for us to eat.  Truth is no matter what the label says… if the chicken isn’t free-roaming on an open field (not a small patch of dirt) then assume it’s not the kind of chicken egg you want to eat.  Why not?  They are simply not ‘safe’ to eat raw.  There are a lot of brands of eggs out on the market today and it’s really hard to visit all of their facilities in order to determine which farms actually meet the ‘standards’ without the misleading information.  We’d like to believe that cage-free really means that these chickens are left into an open field to eat whatever foods they choose to eat (instead of corn, soy, or whatever mass produced cheap ingredients are available) and trust me whatever the minimum requirement is set for a specific label, expect that minimum requirement to be met to the T and no more.   Yes, organic pasture-raised eggs are definitely more expensive (unless you can find them local) and there’s a reason for that.  The feed they give their chickens are on par with something you’d find at an open salad bar: berries, grass, veggies, and protein (in the chicken’s case that’s worms, bugs and other delicious insects that are packed full of nutrition) which is what you want, when you are eating an egg!

You can read more about the misleading ‘labeling’ and nutrition facts about eggs here.

Compare nutritional value of a conventional egg to a organic pasture-raised egg

  • 5 times more vitamin D
  • 2/3 more vitamin A
  • 2 times more omega-3 fatty acids
  • 3 times more vitamin E
  • 7 times more beta carotene

Read more about Raw Egg Safety here.

Warning:  I do not recommend eating any egg raw unless it meets the regulations for the organic pasture-raised eggs, which you can find a reliable source from.
Here is a quote from the whfoods.org (The George Mateljan Foundation
for The World’s Healthiest Foods):

If you do plan to include raw eggs in your meal plan, we recommend that you locate and purchase eggs from a farm in your area that not only produces certified organic eggs but also take steps to ensure a genuinely natural lifestyle for the hens, including a pasture-based diet from a natural landscape with ecologically balanced vegetation. For help in locating a small organic and sustainable egg producer in your area, we recommend that you visit both of the following websites.

Concerned about High Cholesterol?  Read more about the myth with eggs here.

Interested in finding a local provider of organic pasture-raised eggs?  Search localharvest.org to find out where you’re closest supplier is!

I’ve also written a whole bunch about eggs on my website www.bestfood4life.com and if you have time, I recommend checking it out.


Alright, now that I’ve provided to you the forward to eating raw eggs and the benefits/facts regarding the ‘types’ of eggs I recommend based off my education and research.  I’ll move forward with the actual recipe. 😉

This recipe is SUPER easy to make and I have spent a lot of time trying to figure out how to make the best tasting mayonnaise.  I don’t really like an overly olive oil flavored mayonnaise and when I’ve used coconut oil the texture was more like butter (which I actually ended up writing a recipe for, see future recipe.)  I’ve tried a lot of variations and haven’t really been happy with the flavor or consistency.  I don’t use canola oil as it’s simply not healthy to eat.  I’m all about nutrition and packing in the most nutrition and flavor I can is my goal!

Quick & Easy Eggcellent Mayonnaise Recipe

Mayo-with-half-cup-serving-total-LOGO

Ingredients:

  • 2 whole organic pasture-raised eggs (room temperature)
  • 1 lemon juiced
  • 1 tsp. raw coconut vinegar
  • 1/4 tsp. mineral salt
  • 1 tsp. yellow ground mustard seed (dry)
  • 1/2 – 3/4 cup walnut oil

Instructions:

  1. In a blender, mixer, or food processor mix together the eggs, lemon juice, and vinegar.
  2. Mix for a few minutes and allow to set for a few minutes. (I prefer to use a whip the egg with a whisk for a thicker consistency.)
  3. Add the salt, mustard, and walnut oil and blend until you get the consistency you desire.  (I start with 1/2 a cup of walnut oil and work my way up from there depending on how I plan on using it.)  No matter what consistency, the taste will be amazing!  Also, taste your mayo if it’s not salty enough add a dash or two more.
  4. Pour into container, cover and refrigerate for up to 1 week.
    Tip: you can use this mayo right away, but if you want it to be a thicker consistency allow for 1-2 hours of refrigeration before using.

Play around with different oils for a slightly different taste.  Here are some oils I recommend trying:   organic pumpkin seed oil, organic light extra virgin olive oil, organic sunflower oil, and if you really love the taste of avocado-organic avocado oil.

What oil do you prefer the taste of?

Quick & Easy Eggcellent Mayo

  • Servings: 3/4 cup
  • Difficulty: Easy
  • Print

Close-up-Mayo-LOGO

Ingredients:

  • 2 whole organic pasture-raised eggs (room temperature)
  • 1 lemon juiced
  • 1 tsp. raw coconut vinegar
  • 1/4 tsp. mineral salt
  • 1 tsp. yellow ground mustard seed (dry)
  • 1/2 – 3/4 cup walnut oil

Instructions:

  1. In a blender, mixer, or food processor mix together the eggs, lemon juice, and vinegar.
  2. Mix for a few minutes and allow to set for a few minutes.
  3. Add the salt, mustard, and walnut oil and blend until you get the consistency you desire.  Start with 1/2 a cup of walnut oil and more for consistency.
  4. Pour into container, cover and refrigerate for up to 1 week.
    Tip: you can use this mayo right away, but if you want it to be a thicker consistency allow for 1-2 hours of refrigeration before using.

Quick & Easy Yogurt Ranch Dressing (Probiotic, gluten-free, anti-candida, paleo, scd, cow-dairy free)


Eggplant-Fries-Website-w-logo

This ranch is great with Baked Eggplant Fries (in above picture with ranch dressing) and is delicious for whatever else you use ranch with, like dipping your pizza in. 🙂

It’s a probiotic version which includes Goat Yogurt.  If you can’t find plain goat yogurt at your local market, you may want to make the yogurt yourself with using goat milk.  Here’s a pretty informative link you can check out on how to make your own goat yogurt.

If you can’t tolerate goat yogurt, you can substitute with another type of plain yogurt that you can have.  Just make sure that it’s plain with no added sugars or fillers.

Ingredients:

  • 1 cup yogurt
  • 1/2 tsp. dill
  • 1 tbsp. walnut oil
  • 1/4 tsp. mineral salt, I use Himalayan Salt (plus salt to taste, if you like your ranch a little saltier)
  • 2 tbsp. raw coconut vinegar
  • Chives for dressing (optional)

Instructions:

  1. Mix all the ingredients in a small bowl and allow to sit for a few minutes before serving.

That’s it!  Easy as 1..2…3.

NOTE:  This will not taste like a standard supermarket ranch dressing (like Hidden Valley).  That’s not what I was going for as that type of ranch is incredibly unhealthy for your body.  This ranch you could literally eat the whole thing and actually benefit from it.  Though, I may recommend drinking a glass of water with all that mineral salt to help your body absorb the minerals in the salt. 🙂

Yogurt Ranch Dressing

  • Servings: 3-4
  • Difficulty: Easy
  • Print

Ingredients:

  • 1 cup yogurt
  • 1/2 tsp. dill
  • 1 tbsp. walnut oil
  • 1/4 tsp. mineral salt, I use Himalayan Salt (plus salt to taste, if you like your ranch a little saltier)
  • 2 tbsp. raw coconut vinegar
  • Chives for dressing (optional)

Instructions:

  1. Mix all the ingredients in a small bowl and allow to sit for a few minutes before serving.

Baked Eggplant Fries (gluten-free, anti-candida, scd, paleo, vegetarian)


Baked-Eggplant-header-with-logo

I know it’s been a while since I’ve posted an actual blog-it hasn’t been a while since I’ve been writing recipes.  I write recipes almost every single day and most of the time they are a success as in they are ‘eatable’ but are they perfect?  Well, that’s why I usually remake them over and over again until they are pretty close to perfect.  Sometimes, I don’t have to make them over and over in order to get a perfect recipe.  Like this one for example.  I was really having a craving for fries and I wanted to do something completely different, which brings me to eggplant.  Usually eggplant is very moist when cooked, like sautéing for example.  It’s great in sauce dishes and I know a lot of people make eggplant pizza and lasagna with it–but what about fries?

This is a fairly simple snack or side to make with any meal and it’s a nutritious one at that!

The ingredients are pretty straight forward:

  • 1 eggplant sliced to shape of fries (however you like your fries from thin to steak fries)
  • 1 cup coconut flour
  • 1/2 cup almond flour
  • 1 tsp. dried rosemary
  • 1 tsp. dried thyme
  • 1/2 tsp. granulated garlic
  • 1/2 tsp. smoked paprika
  • 1/4 tsp. mineral salt (Himalayan Salt works great)
  • 2 eggs
  • 1 Tbsp. coconut oil (melted)

You can cut the fries however you like but take note, when you cut them thinner the baking time will be less and you’ll have to move them around so they don’t get overly crispy (especially those around the edges of the baking sheet).  The opposite is true with the thicker steak fries.  Expect to cook the thicker cut fries longer and you’ll have to flip them halfway through the baking process.

I cut mine between thin and thick.Cut-Eggplant-into-Fries-Website-w-logo

As you can see, some of them are slightly thicker than the others and that’s totally fine-just remember that when you are baking them as they may need a little more time to bake.

The instructions are pretty straight forward also, especially if you’ve ever breaded anything before.  I’ll break it down just how I did it just in case this is your first attempt at breading something.

  1. Preheat the oven to 400 degrees F.
  2. Line a baking sheet (preferably stainless steel-aluminum free) with bleach-free parchment paper.
  3. If you haven’t already, slice the eggplant to your desired thickness keeping the skin on. (discard the top leafy part of the eggplant)
  4. In a mixing bowl stir together dry ingredients: almond flour, coconut flour, seasonings, and salt.
  5. In a separate mixing bowl whisk together the eggs and coconut oil.
  6. Start by taking a few slices of eggplant and soak them in the egg mixture for a few seconds, shake off excess egg batter and transfer eggplant into dry mixture.  (Tip: one thing I do is take a plate and spread out the dry mixture to prevent the bowl from getting soggy.  It’s also easier to roll the fries on a plate vs. a bowl.  After coating some of the fries, I add a little more flour mixture to the plate and continue this until the fries are completely done.)
  7. Transfer the battered fries to the baking sheet and allow a little space between the pieces.
  8. Depending on how you cut your eggplant you may need more than one baking sheet to complete the full batch.  (I used 2 baking sheets when I cut this eggplant into these thinner slices)
  9. Bake for 25-30 minutes, after 20 minutes flip the fries and continue to bake for 5-10 minutes until golden brown.
  10. Remove from oven, plate and enjoy!

Note: If you find that these are a little on the ‘dry’ side for you, take some Extra Virgin Olive Oil and drizzle over the fries once they are done baking.  These are also delicious with a side of homemade quick ranch or Dijon mustard!

Egg-plant-Fries-Website-w-logo

Baked Eggplant Fries

  • Servings: 4-6
  • Difficulty: Easy
  • Print
 

Eggplant-Fries-Website-w-logo

Ingredients:

  • 1 eggplant sliced to shape of fries (however you like your fries from thin to steak fries)
  • 1 cup coconut flour
  • 1/2 cup almond flour
  • 1 tsp. dried rosemary
  • 1 tsp. dried thyme
  • 1/2 tsp. granulated garlic
  • 1/2 tsp. smoked paprika
  • 1/4 tsp. mineral salt (Himalayan Salt works great)
  • 2 eggs
  • 1 Tbsp. coconut oil (melted)

Instructions:

  1. Preheat the oven to 400 degrees F.
  2. Line a baking sheet (preferably stainless steel-aluminum free) with bleach-free parchment paper.
  3. If you haven’t already, slice the eggplant to your desired thickness keeping the skin on. (discard the top leafy part of the eggplant)
  4. In a mixing bowl stir together dry ingredients: almond flour, coconut flour, seasonings, and salt.
  5. In a separate mixing bowl whisk together the eggs and coconut oil.
  6. Start by taking a few slices of eggplant and soak them in the egg mixture for a few seconds, shake off excess egg batter and transfer eggplant into dry mixture.  (Tip: one thing I do is take a plate and spread out the dry mixture to prevent the bowl from getting soggy.  It’s also easier to roll the fries on a plate vs. a bowl.  After coating some of the fries, I add a little more flour mixture to the plate and continue this until the fries are completely done.)
  7. Transfer the battered fries to the baking sheet and allow a little space between the pieces.
  8. Depending on how you cut your eggplant you may need more than one baking sheet to complete the full batch.  (I used 2 baking sheets when I cut this eggplant into these thinner slices)
  9. Bake for 25-30 minutes, after 20 minutes flip the fries and continue to bake for 5-10 minutes until golden brown.
  10. Remove from oven, plate and enjoy!

Zucchini Spaghetti & Meatballs (Free of Grains, Gluten, Dairy, Nuts and Soy)


Zucchini Spaghetti and Meatballs

This is seriously one of my favorite recipes that I’ve made recently and it’s SOOOO good!

For 2 years my husband and I were basically Pescetarians (minus grains and dairy) for health reasons.  Today our bodies continue to heal and optimize standards for the way we live life.  This past year we were able to introduce eggs and some animal meat like, lamb and beef.  The standards of which we eat our eggs are 100% organic (no-soy) pasture raised chicken eggs and our beef/lamb is 100% organic grass-fed no-hormones, pesticides, etc..etc..

It’s the closest we can get to wild in modern civilization.

Grass-Fed-Beef_Watermarked

Note: While this isn’t a Vegan recipe I am however working on a Vegan version because this is just an absolutely delicious meal that everyone deserves to be able to savor. If you don’t eat meat, I still encourage you to make this recipe minus the meatballs.  The sauce is DIVINE!  🙂

Okay, Okay.. let’s talk recipes!

I’ll break it down by steps and include some pictures and then at the bottom I’ll have the quick and easy version that is printable.

Also, I didn’t specify each ingredient as organic, but it should be noted that all ingredients are organic.


zucchini spaghetti & meatballs (serves 4-6)


zucchini noodles ingredients

4-6 medium zucchini

zucchini noodle instructions
  1. Using a spiral slicer, spiral slice zucchini’s and set aside in a bowl.
    Note: this recipe serves 6 people with each person getting approximately 3 meatballs each, if you want more meatballs assume this recipe serves 4 instead.  We made 4 servings, but ate a lot of meatballs.. nom! 🙂

Zucchini-Noodles_Watermarked


meatball Ingredients (organic)
  • 2 lbs. Organic 100% grass-fed beef
  • 2 tbsp. coconut oil (refined)
  • 2 whole pasture-raised eggs (optional)
  • 1/3 cup coconut flour
  • 1/4 cup nutritional yeast
  • 3 cloves of garlic
  • 1 tbsp. raw coconut aminos
  • 1/4 tsp. cayenne pepper
  • 1/2 tbsp. herbes de provence
  • 1/2 cup finely chopped onions
  • 1/2 tsp. Himalayan salt

VeggiesComments
The reason I say ‘refined’ coconut oil is simply to make sure that you don’t have the ‘coconut’ flavor.  While coconut flavor is always nice in desserts- it doesn’t always apply to main courses.  If I specify refined, trust me that it’s not going to taste good.  (That is.. not unless you’re coconuts for coconuts!)


Notes:
Eggs optional?

Yes, you don’t need eggs to make this dish.
(Consider this substitution- 2 tbsp. ground flax seed mixed with 2 tbsp. water)

Nutritional Yeast?

Becoming a more popular name used in a lot of recipes these days, nutritional yeast is a great substitute for ‘dairy’.  It does not contain dairy and in fact is a bi-product of molasses.  Can’t have yeast?  Depending on your reasons for not being able to have yeast (i.e. Gaps, candida..) you may want to research whether or not this falls into the same category of whether you may or may not have a reaction to it.  I have done a lot of research related to Candida and nutritional yeast does not affect candida the same as brewer’s yeast or baker’s yeast does.  In fact it’s made from an entirely different bacteria family (see S. Cerevisiae).  Those who have Candida should do research and even talk to some experts that have done their research on Nutritional Yeast.  Most N.D’s will err on the side of caution because it says ‘yeast’ and recommend that you avoid it as well as every other yeast.  However, there is such a thing as good yeast vs. bad yeast.  Good yeast, like nutritional yeast, is an immune system booster because it stimulates the body’s production of antibodies.  If you’re interested in learning more read this article for starters.  And as always.. listen to your body.

Where can you get Nutritional Yeast?

You can get nutritional yeast is at every Whole Foods and most natural markets stock them in their bulk section or their nutritional/supplement section.  Still can’t find nutritional yeast?  Look online there are tons of places online that supply nutritional yeast!

Why Himalayan Salt?

It’s a great source of minerals for you and has a ‘saltier’ taste without having to add as much sodium.  There are other great salts out there but for the most part I prefer Himalayan Salt over others.  Remember this salt (and most salts) does not supply iodine.


Meatball Instructions
  1. In a large mixing bowl, whisk eggs. (or egg substitute: flax seed and water)
  2. Add meat to eggs and mix well using your hands.
  3. Add remaining ingredients, except coconut oil. (Tip: combine and mix all the dry ingredients together before adding to the meat and then add the coconut aminos)
  4. When everything is mixed together well, form small ‘golf-ball’ sized balls with the meat.  You should be able to form about 21-22 balls.
  5. In a large skillet pan (preferably a large cast iron pan) melt coconut oil on medium-high heat.
  6. When the oil has completely melted, add the balls to the pan. (you should be able to fit all 21-22 balls to the pan)
  7. Cook meatballs for 1-2 minutes each side. (Meatballs will not be fully cooked through and you are simply searing the outside of the meat)
    Side one
    Meatballs-cooking first side_Watermarked

    Side two
    Meatballs-Cooking-one-side_Watermarked

  8. After both sides have been pan seared, transfer to meatballs to plate and set aside.

    Meatballs-Set-AsideWatermarked


Sauce ingredients (Organic)
  • 24 oz. organic strained tomatoes (I use Bionaturae)
  • 1 tbsp. coconut oil (refined)
  • 1 cup chopped yellow onion  (about 1/2 a medium-sized onion)
  • 2 medium tomatoes (on-the-vine or beef tomatoes)
  • 2 minced garlic cloves
  • 6-8 fresh basil leaves (finely chopped)
  • 2 tsp. coconut aminos
  • 1/2 tsp. fresh cracked black pepper
  • 1 tsp. dried oregano
  • 1/2 tsp. salt
  • 1 cup of water
  • 1-2 tbsp. extra virgin olive oil (add at the end)
Sauce instructions
  1. Using same pan (cleaned) that the meatballs cooked in melt coconut oil on med-high heat.
  2. Add chopped onions and cook for 2 minutes, until onions are slightly translucent.
  3. Add garlic first (stir a few seconds) then add the strained tomatoes and chopped tomatoes.  Cook for 1-2 minutes allowing to simmer.
  4. Turn the heat to low, add the remaining ingredients (except olive oil) and simmer for 10 minutes.

    Sauce-Close-up_Watermarked

  5. Add meatballs to pan and cover for 10 minutes.
  6. Remove cover and turn each meatball in sauce, continue to cook for 10-15 minutes until meatballs are cooked through.
  7. Turn off heat and drizzle 1-2 tbsp. extra virgin olive oil on top of sauce and meatballs.

    Cooked-Meatballs-in-Sauce_Watermarked

  8. Serve on a bed of Zucchini noodles (3-4 meatballs), sprinkle salt & pepper to taste, garnish with some fresh basil and DEVOUR!  😉

    Finished-Product_Watermarked

Hope you enjoy this recipe as much as we did!! 🙂

Finished-Product-3_Watermarked

Zucchini Spaghetti & Meatballs

  • Servings: 4-6
  • Difficulty: Moderate
  • Print

Finished-Product-2_Watermarked

zucchini noodles ingredients

4-6 medium zucchini

zucchini noodle instructions
  1. Using a spiral slicer, spiral slice zucchini’s and set aside in a bowl.
meatball Ingredients (organic)
  • 2 lbs. Organic 100% grass-fed beef
  • 2 tbsp. coconut oil (refined)
  • 2 whole pasture-raised eggs (optional)
  • 1/3 cup coconut flour
  • 1/4 cup nutritional yeast
  • 3 cloves of garlic
  • 1 tbsp. raw coconut aminos
  • 1/4 tsp. cayenne pepper
  • 1/2 tbsp. herbes de provence
  • 1/2 cup finely chopped onions
  • 1/2 tsp. Himalayan salt
Meatball Instructions
  1. In a large mixing bowl, whisk eggs. (or egg substitute: flax seed and water)
  2. Add meat to eggs and mix well using your hands.
  3. Add remaining ingredients, except coconut oil. (Tip: combine and mix all the dry ingredients together before adding to the meat and then add the coconut aminos)
  4. When everything is mixed together well, form small ‘golf-ball’ sized balls with the meat.  You should be able to form about 21-22 balls.
  5. In a large skillet pan (preferably a large cast iron pan) melt coconut oil on medium-high heat.
  6. When the oil has completely melted, add the balls to the pan. (you should be able to fit all 21-22 balls to the pan)
  7. Cook meatballs for 1-2 minutes each side. (Meatballs will not be fully cooked through and you are simply searing the outside of the meat)
  8. After both sides have been pan seared, transfer to meatballs to plate and set aside.
Sauce ingredients (Organic)
  • 24 oz. organic strained tomatoes (I use Bionaturae)
  • 1 tbsp. coconut oil (refined)
  • 1 cup chopped yellow onion  (about 1/2 a medium-sized onion)
  • 2 medium tomatoes (on-the-vine or beef tomatoes)
  • 2 minced garlic cloves
  • 6-8 fresh basil leaves (finely chopped)
  • 2 tsp. coconut aminos
  • 1/2 tsp. fresh cracked black pepper
  • 1 tsp. dried oregano
  • 1/2 tsp. salt
  • 1 cup of water
  • 1-2 tbsp. extra virgin olive oil (add at the end)
Sauce instructions
  1. Using same pan (cleaned) that the meatballs cooked in melt coconut oil on med-high heat.
  2. Add chopped onions and cook for 2 minutes, until onions are slightly translucent.
  3. Add garlic first (stir a few seconds) then add the strained tomatoes and chopped tomatoes.  Cook for 1-2 minutes allowing to simmer.
  4. Turn the heat to low, add the remaining ingredients (except olive oil) and simmer for 10 minutes.
  5. Add meatballs to pan and cover for 10 minutes.
  6. Remove cover and turn each meatball in sauce, continue to cook for 10-15 minutes until meatballs are cooked through.
  7. Turn off heat and drizzle 1-2 tbsp. extra virgin olive oil on top of sauce and meatballs.
  8. Serve on a bed of Zucchini noodles (3-4 meatballs), sprinkle salt & pepper to taste, garnish with some fresh basil and enjoy!

Chunky Double Fudge Brownies (Raw//Vegan//Gluten-Free) *~Great for Valentine’s Day~*


Love is in the air tonight with these delicious…

Raw-Double

Enjoy

When you have a craving for chocolate and something easy, look NO further.  These are the MOST delicious, almost sinful, brownies ever! The only problem with them is.. they go too quickly! Good thing they are pretty darn healthy, low glycemic sugar and help with any type of chocolate cravings!  Another fabulous thing about these brownies are that they are also very easy to make.  They are raw so the health benefits and nutrients they provide are provided in the most beneficial state.

This recipe, makes about 24 2″x3″ squares:

24-pieces-(1-missing)

Picture shows 23… 1 of the 24 squares um… couldn’t fit on the cutting board… 😉

I thought I would make this recipe a print-friendly version to make it easier on you when it comes to make these guys!

Remember: 2 squares = 1 date.

Chunky Double Fudge Brownies

  • Difficulty: easy
  • Print
Chunky Brownie Ingredients (bottom layer):

  • 1 cup raw walnuts
  • 1/2 cup hulled hempseeds
  • 1 tbsp. chia Seeds
  • 1 heaping cup of ‘de-pitted’ medjool dates (approximately 12 dates)
  • 1 tbsp. coconut nectar
  • 1/2 cup cacao powder
  • 1 tsp. vanilla extract
  • 1/4 tsp. Himalayan salt
  • 1/2 cup cashews

Double Fudge Ingredients (top layer):

Kitchen Tools:

Directions (First half): prep-time approx. 5-7 minutes

  1. Prepare your glass baking dish, by lining it with parchment paper.  You can either cut it to fit exactly, or you can cross your parchment paper (one overlapping the other).  Make sure that the entire bottom of the glass dish is covered with parchment paper and there is paper sticking out above the dish so it’s easy to lift out.
  2. In your large food processer add the following: walnuts, hemp seeds, chia seeds, salt and pitted dates.  Process until fine crumbs.
  3. Add cacao powder and process until well-incorporated.
  4. While food processor is off, add coconut nectar and pulse several times to mix.
  5. Turn food processor on and add vanilla extract (turn off when extract has been mixed in well)  this should only take a few seconds.
  6. While Food processor is off, add cashews and pulse 10 times. (The cashews should be crushed but still chunky.  This will add the ‘chunk’ to your brownies.)
  7. Take mixture and press evenly into baking dish (on top of the parchment paper).
  8. Freeze while you prepare the chocolate fudge.

Directions (second half): prep-time approx. 3-5 minutes, wait-to-enjoy time about 20 minutes.

  1. In small sauce pot, melt coconut oil on medium-high heat. (should only take about a minute)
  2. Remove sauce pot from heat, once oil is liquid and using a fork or whisk, stir in cacao powder until mixture becomes a chocolate glaze.
  3. Stir in coconut nectar or agave, cinnamon, vanilla extract and liquid stevia.
  4. Remove baking dish from freezer and pour chocolate glaze over top of the pressed brownies.
  5. Freeze for 3-5 minutes and sprinkle on the sea salt or Fleur de Sel.
  6. Return to freezer and freeze for about 15 minutes.
  7. Remove from freezer, pull up on parchment paper to remove the frozen block easily.
  8. Set on hard surface and cut squares ( for 24 squares about 2″x3″) or 23 if you eat one while cutting.
  9.  For storing: return to glass dish and store in freezer OR fridge.  Of course, feel free to eat some before you store them. 🙂

Hope you enjoy them as much as we do!

Husband-Approved

I’d love to hear what you thought of this recipe or if you had any questions.  Please feel free to post your feedback in the comments sections below!

Snack Recipe: Sweet Curry Cashews


~Secret Recipe preview from the soon-to-be released BestFood4Life cookbook~

Yummy yummy snacks in my tummy!
These cashew snacks are sure to beat your cravings, whether it be sweet or salty, enjoy this savory treat!

Sweet-Curry-Cashew-REVEAL-Photo

Let’s get started!

Ingredients:
2 cups of cashews
2 Tbsp. yellow curry powder
1 Tbsp. unrefined coconut sugar
1 tsp. granulated garlic
1 tsp. smoked paprika
1 tsp. ground chipotle (optional)
1/2 tsp. of Real Salt or Himalayan Salt (I used Real Salt)
1/3 cup of coconut oil (room temperature or melted)
Ingredients

Real Salt ingredients
Tools:
Metal Mixing bowl
Mixing Spoon (preferably metal or glass)
Baking Tray
Measuring spoons
Measuring cups
Parchment Paper
Oven

Step ONE: Start off by adding 2 cups of cashews into a mixing bowl a metal mixing bowl heats easier than a glass mixing bowl and typically I only use safe plastic mixing bowls if I know I’m not using any heat at all as I don’t trust that the plastic won’t leach out somehow, no matter what FDA regulations are verified (or not).  It’s a personal preference overall, but if you are using plastic pre-melt your coconut oil.
Coconut Oil In Cashew Bowl

Step TWO: Add 1/3 cup of coconut oil. (room temperature or melted)
At this time, you can start the process of pre-heating your oven to 350degrees F.
Oven Temperature
What I do is stick my bowl into the oven, for 10 seconds while it’s beginning to pre-heat.  That way the coconut oil melts just right.  I also don’t believe in microwaves as they completely destroy foods, the other option is to melt the oil on the stovetop which can be a little bit inconvenient and add a couple minutes and extra cleanup to your ‘simple’ snack.  If you don’t mind doing that, feel free to add the extra steps to melt your oil.  Sticking the bowl is by no means a difficult or dangerous task and if you can outsmart the system, why not? 🙂
Warm in oven

Now, the oil is melted JUST perfectly!
Melted Coconut Oil mixed

Alright, now the fun part.
STEP THREE: Add the 2 tbsp. of yellow curry to your mixing bowl once you have fully mixed the coconut oil.
2 tbsp yellow curry powder

Mix the curry in, until well incorporated. Yellow Curry Added and mixed

STEP FOUR: Add 1 Tbsp. unrefined coconut sugar
1 tbsp coconut sugar

Mix into cashew mixture.
Coconut Sugar Added to the mix

STEP FIVE: Add 1 tsp. smoked paprika
1 tsp smoked paprika

Mix into cashew mixture.
Smoked paprika added to the mix

Step SIX: add 1 tsp. of granulated garlic
1 tsp granulated garlic

Mix into cashew mixture.
Granulated garlic added to the mix

Step SEVEN: (optional) add 1/2 tsp. ground chipotle
(Feel free to add more if you like it REALLY spicy or use cayenne pepper)
half a tsp of chipotle

Mix really well into cashew mixture, that way the heat is evenly distributed. (NOM!)Chipotle added to the mix

These are lookin’ really good and you’ll be tempted to try one, go for it!
I like to add the salt at this point, you may find that you like this to be more sweet than savory.  If so, skip the salt.  No one is judging you. 🙂

Now, if you’re adding the salt.  Let’s move to the next easy step.
Step EIGHT: add 1/4 tsp. of Real Salt
half tsp of real salt

and you guessed it, mix it in nice and good.  Same with the chipotle, you don’t want a bite that’s SUPER salty either.
Cashews with salt added

Now’s the time when you’ll really be tempted to eat them, feel free to taste away, but trust me when I say they taste even better after they’ve baked for 20 minutes.

So far these are easy steps right?  I broke them down because I like how the nuts get lathered up with spices when you mix it as you go.  You could be lazy and just dump all the ingredients in one simple step, but trust me the flavor gets really layered when you take the time to do it this way.  It takes about 1 minute extra to take the time to mix between adding ingredients. 🙂

Step NINE: add the cashew mixture to a baking tray lined with parchment paper.
(Tip: Spread out the cashews so they evenly roast.  If you dump them in a big pile, they won’t cook evenly and some will be soft while others are over-roasted.  Give em’ room and watch them turn to masterpieces!)

Parchment paper on tray

STEP TEN: place the tray in the oven once your oven has reached 350degrees  and wait for 20 minutes. (don’t forget to start that timer!)
20 minutes time

I use this time to tidy up the kitchen and today I made my lunch and ate it! 🙂 Kitchen’s clean, husband will be happy and I got to eat a delicious meal WIN WIN!

Ooooh 20 minutes is up… let’s check the cashews!
After cooking

NOM!  PERFECTION!
Allow to rest for a few minutes before snacking on a few.
Then decide if you want to eat some warm….
Cup and Jar
or store away for when the snack monster attacks! 🙂
Which for me… is right about now.
Jar and bowl of cashews

Hope you enjoyed this recipe!  I’d love to hear your experiences and feedback!!

<3Jem